



How do you install an earth electrode and set up off-grid operation – with Richard Nyberg
In this episode, we visit Blidö in the Stockholm archipelago. This installation features Huawei’s new MAP0 inverter series together with Huawei Smart Guard (three-phase). We’re also introducing Longi’s new Himo X6 Ultra Black series, which blends in with the roof, alongside Weland Stål’s all-black mounting system for the Nordic climate.
We’ll take a closer look at the details of earth electrode resistance testing and how to check an earth electrode, as well as the installation and commissioning of Huawei’s MAP0 inverters. An ATS (automatic transfer switch) will also be installed with Huawei Smart Guard. It disconnects the property from the grid in the event of a power cut, allowing the house to operate in island mode.

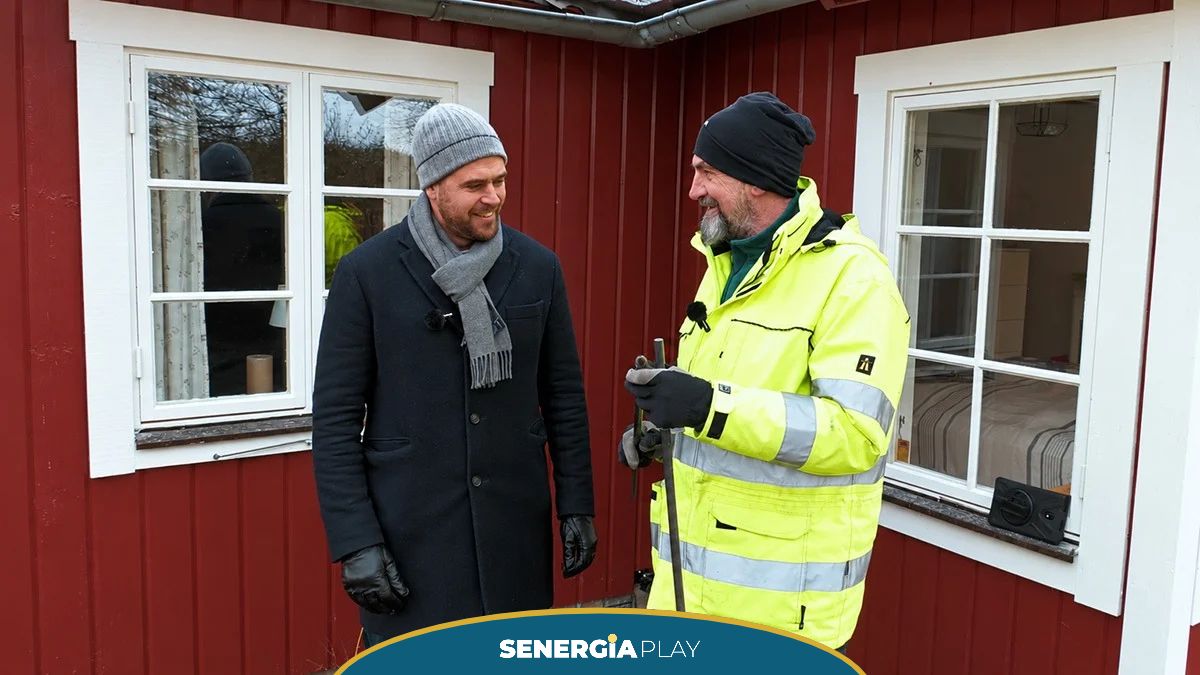
0:08
Hello everyone, and a very warm welcome to a
0:10
new episode of Sener Play. Today I’m
0:13
out in the Stockholm archipelago, on
0:15
Blidö, and the first snow has arrived. It’s
0:17
quite chilly, but it’s a wonderfully
0:20
beautiful day. In this episode, we’re going to
0:23
look at quite a few new products. We’re going to
0:25
look at a brand-new
0:28
inverter, the M0. What’s unique about
0:32
this product and the range is that
0:34
it supports three-phase island mode,
0:38
which is new for Huawei. Alongside that,
0:41
there’s a new SmartGuard with a so-called
0:44
ATS, or automatic transfer
0:47
switch, which will handle connection and
0:48
disconnection from the grid during grid-connected operation
0:51
or island mode. We’ll look at
0:54
earth electrode resistance testing and how to measure
0:56
your earth electrode. This
0:59
installation also has Longi’s
1:02
brand-new Ultra Black panels.
1:04
[Music]1:11
series. Before we go in and look at
1:14
the installation and the details, let’s
1:17
start with a quick recap. What exactly is
1:20
an earth electrode, and why is it
1:22
important in our Swedish electrical system? Well,
1:24
typically, four cables come
1:27
into your property. There’s a
1:30
PEN conductor and our three phases, and
1:33
the earth is never broken in the system. Another
1:38
important thing to bear in mind
1:40
is that when the inverter
1:41
has sunlight on the panels and is operating
1:46
as normal, connected to the grid, there’s
1:48
nothing unusual. But if there were to be
1:51
a power cut, it could just as easily be
1:53
a cable dug up in the road,
1:56
for example during roadworks. In that case,
1:58
the inverter must not feed
2:00
any current or voltage into the grid,
2:03
as that could put electricity
2:05
or line workers servicing the distribution
2:08
network in danger. That’s why you have to
2:10
disconnect from the normal electricity grid
2:14
you’re connected to during grid-connected operation when
2:17
you switch to off-grid operation. When you do,
2:20
you also lose your connection to
2:22
earth. It’s important to remember
2:24
that you then need a new local
2:26
earth electrode. This earth electrode is a little
2:29
special, and we’ll go through step
2:31
by step how to measure it and
2:33
check that it works, as well as
2:35
how to install a proper earth electrode. So,
2:38
what exactly is an earth electrode? Well, an
2:40
earth electrode is essentially a point where we
2:42
can establish earth potential. We need to check that
2:45
this earth electrode or rod that we’re going to
2:47
hammer in has
2:49
proper contact with the earth. Join us for today’s
2:52
measurements. We have an old Sener Play
2:55
familiar face with us, Rickard. Hi, Rickard.
2:57
Hi! So, what are we going to do today
3:01
to get a better understanding of this earth electrode?
3:04
We’re going to take some measurements to
3:06
make sure we get a good resistance value in
3:07
the ground, so we know we’ll have good
3:09
protection when the installation is operating.
3:12
Why is this earth electrode so
3:14
important in the installation? Well,
3:17
when we operate in island mode, we’re assuming
3:18
that we’ve disconnected the network operator’s
3:20
cable, so we need our own
3:22
earth electrode to provide good earthing.
3:27
For installers who are a little unsure
3:30
about how to install an earth electrode,
3:32
do you have any tips? What should you think
3:34
about when choosing a location for the earth electrode,
3:36
and how should you plan your
3:40
installation? I usually start with
3:43
two earth rods and 25 metres of
3:46
copper cable, copper conductor, so that gives
3:49
you a good starting point. Then we measure
3:52
to check that we get a good earth resistance.
3:54
Right. So the first thing we’ll do now, before
3:55
we drive the earth rod, the earth electrode itself,
4:00
into the ground somewhere on the property, is measure
4:02
where we think we’ll get good earthing
4:04
and a low, stable resistance value.
4:06
So the first step is really
4:09
to lay out the measurement probes and
4:12
test the ground. Exactly. We have to do that
4:15
first. Let’s do it.
4:16
[Music]4:24
Right, let’s take a look at
4:27
the equipment we’ve brought with us, Rickard. Let’s start
4:28
with the copper conductor.
4:59
Then you take the sledgehammer and drive these down into
5:01
the ground. First, we need to attach the
5:03
copper conductor to the top here. We have
5:06
the tip itself, and then we put
5:10
the copper conductor in here so we lock
5:13
the two together, which means we take the
5:15
copper conductor down with us. If we do this job
5:17
badly, the copper conductor will come loose,
5:20
and we’ll have wasted some. Yes, and
5:24
you don’t want that when you’re on an island.
5:26
No, we’re a long way from civilisation
5:28
today, so you have to improvise to get it
5:31
down. So, once we’ve joined
5:35
these two parts together, we start
5:38
driving them into the ground, using
5:41
a sledgehammer or a machine
5:43
to drive them down. That’s right.
5:45
Usually, you drive them down a little over two metres.
5:49
And you’ve also brought a measuring instrument.
5:51
Yes, now we need to measure and make sure we get a
5:53
good reading. What sort of
5:55
device is this? This is an instrument from
5:58
Elma. It’s a small
6:01
earth electrode tester, which lets us measure
6:05
and make sure we get a good result.
6:14
Earth electrode resistance test.
6:19
So here we have
6:28
the reference measurement, and the earth resistance
6:29
can be high. If so, we’ll probably need
6:32
more earth electrodes. Exactly. The other two,
6:34
yellow and red here, are placed
6:37
five to ten metres apart
6:40
to give us a long distance between them, so
6:43
we get a stable earth electrode
6:44
over time. It needs to last. What does
6:47
that actually mean? We don’t want
6:49
summer drought to affect the earth electrode;
6:52
it needs to last over time,
6:54
whatever the weather. The soil’s conductivity
6:56
is affected by the seasons. The soil gets
6:58
drier in winter, and wetter
7:01
in spring, summer and autumn. With this
7:04
device, we can measure
7:07
the expected values for
7:10
the soil’s conductivity, you could say.
7:12
Yes, then we have an idea of what the final
7:14
result will be. But that can also
7:16
change when you drive the rods down,
7:18
so you take another measurement when you’re done.
7:21
Exactly, to check that what you’ve done
7:22
works as intended. And once you’ve installed your
7:24
earth electrode and got good readings, you also need to
7:27
check it regularly to show that you still have
7:30
the right
7:41
resistance at the earth electrode. Exactly. We need to check
7:45
this every eight years, according to the regulations.
7:47
That’s the maximum interval, or you can do it more often.
7:51
Eight years is the longest interval.
7:53
We check that it works, and it needs to be
7:55
documented throughout. Often, with an island-mode
8:01
installation, this also needs to be reported
8:04
in the advance notification, so there’s a bit more
8:05
to report for an installation like this.
8:13
Earth electrode resistance test.
8:18
How does it work in practice, in terms of
8:19
disconnection time and how it connects
8:22
to the grid or to the customer’s
8:24
installation? Great. Let’s run a few tests
8:27
and see if we get a good reading.
8:30
We can start by setting it to the highest range,
8:32
2,000 ohms, so we can see that we’re not off the scale.
8:35
It shows 0.2, so we’ll go down to a lower range.
8:42
We’re on 20 ohms now, and it shows 3.4
8:44
ohms. That’s a very good reading.
8:48
It’s low, which basically means
8:50
we have a good reference point for our probes.
8:54
Exactly, so we’ll get a good final result.
8:56
This should turn out really well once we drive our
8:59
copper rods down. So you’ve already got
9:02
a good indication of the final result
9:04
from the readings here.
9:05
Yes, I’d say it could go up
9:08
to around ten when we’re finished.
9:11
Perfect. It’ll be exciting to see.
9:14
Yes, absolutely.
9:16
[Music]9:23
Right, we’ve driven our earth electrodes down.
9:26
We ended up with two rods, and connected
9:30
the copper conductor here. Rickard, what did we get
9:32
when we measured it?
9:35
Well, we can switch the instrument on
9:37
and test it here. We can see that
9:39
we’re getting a little higher reading: around
9:43
20.8 ohms. That’s a little higher than
9:47
what I said, but it’s still good enough.
9:50
Let’s talk about that a bit. What’s a
9:52
good enough value? What counts as a good
9:54
earth electrode resistance? It should be stable.
9:57
That’s a good value. Some network operators specify 100
9:58
ohms on
10:14
their earth electrodes, but there isn’t a definitive
10:16
value that it has to meet.
10:18
It needs to be a good value,
10:21
and many network operators still require it to be
10:23
below 100, but some have removed the requirement.
10:24
So you need to check what threshold
10:27
your network operator has set for earth electrodes.
10:28
How was it again? You did a few tests
10:31
here first to see if we had a good
10:34
reference, but we didn’t.
10:35
So we used the network operator’s measurement
10:38
as the reference. Exactly. That gave us a
10:40
better value, and we worked from that.
10:41
So now we have a good value to work
10:43
from. The two measurement probes were placed here,
10:46
and then we drove our earth rods down and installed the earth electrode.
10:48
They’re almost three metres deep, three metres
10:54
in total. We were lucky with the soil here,
10:57
or was this what you’d expect?
11:00
I’d say so. Often you hit a stone
11:01
down there and the rods bend,
11:03
but usually you can drive two rods in without any problem.
11:07
We’ve got three sections down, which is even
11:09
better. I think that’s good.
11:14
So the first task at the installation site is done:
11:17
checking that we have a good earth electrode.
11:19
And we do. You can also refer to
11:22
the Electrical Installation Regulations and compare
11:24
the reading with the type of soil we have,
11:26
such as topsoil. The table shows
11:28
what value we can expect. You also spoke
11:31
to the electrical installers here about planning
11:33
the installation. The copper conductor comes
11:35
to a busbar, and from the busbar
11:38
we go into the consumer unit. Exactly.
11:41
We connect it at the first point in the consumer unit
11:43
so we have an unbroken connection. Let’s head inside
11:46
and test the installation.
12:03
We’ve made our way down to the basement,
12:05
and here we have SmartGuard. This is
12:08
a completely new product from Huawei,
12:10
a three-phase unit. In this new
12:14
version, as you can see from the wiring diagram,
12:16
you can connect both the inverter and the
12:18
supply, as well as the backup circuits.
12:20
What’s unique about this new
12:23
version is that it’s three-phase.
12:25
That means we can provide backup for three-phase loads
12:27
or even for the whole house,
12:29
which is what we’re going to do here.
12:34
This works thanks to the new inverter,
12:36
called the M0. The MAP can operate in
12:40
three-phase island mode. It switches from grid-connected
12:43
to off-grid operation in just a few
12:47
milliseconds, so the lights will barely
12:51
flicker when it switches over.
12:53
The M0 is available up to 12 kW,
12:54
so it can run fairly large loads in
12:57
most Swedish homes, if you want
13:01
to power a lot of equipment. Below it
13:04
is Huawei’s new S1 battery. The difference
13:06
between the S0 and S1 is that, in addition to
13:09
getting significantly more battery cycles,
13:12
you also get greater battery capacity: seven
13:15
kilowatt-hours instead of five before.
13:18
So it’s a much more capable battery.
13:20
And here we have the ATS. What exactly
13:22
does that do? It lets us use this installation
13:25
in island mode when the grid—well, when the network operator’s
13:27
voltage disappears. It switches over
13:29
automatically, so we won’t even notice
13:30
the power going off. Huawei’s unit is called
13:34
SmartGuard. It contains a set of relays
13:37
and some switches. What do we have
13:39
here, exactly? We have their new EMMA, which controls the whole
13:42
process, and then we have
13:44
a fuse for the inverter,
13:46
one for the grid and one for the backup
13:47
loads. Those are the fuses here.
13:49
There’s also one more for another
14:09
inverter. Now, to test it, we’ve connected
14:12
our local earth electrode here, and we can actually
14:13
simulate a cable being dug up
14:15
out in the road and see what happens
14:18
if the power goes off. Absolutely.
14:21
Right, let’s switch it off. We’ll disconnect from
14:23
the grid and turn the grid off.
14:26
Now there’s a power cut. A power cut.
14:29
Did anyone notice anything? Was there
14:31
a power cut? No, absolutely nothing.
14:32
That’s fantastic. It only takes a few milliseconds
14:34
to switch over to island mode
14:37
once it disconnects, and the lights didn’t
14:39
even flicker. No, it’s fantastic. But now that we’re
14:41
in island mode, Rickard, what do we need to consider
14:43
from an electrical safety point of view?
14:59
We need to make sure the protective devices work.
15:01
Right, because now there’s no external grid
15:03
feeding power in. The battery and
15:05
solar panels are providing the
15:06
short-circuit current, so we need to
15:08
carry out new calculations and make new
15:10
measurements. How do we go about that?
15:12
We use an instrument that measures short-circuit current,
15:14
then add up the results and do a
15:17
calculation to see if we need to
15:18
add any further protection devices,
15:19
such as residual current devices or other
15:21
fuses. Right, for overload or earth faults.
15:24
Yes, and for fire protection, so to speak.
15:28
Great. Let’s start measuring
15:30
and see what readings we get.
15:32
Absolutely. You can see the difference:
15:35
we get a higher short-circuit current and
15:38
a low impedance value when we’re
15:40
grid-connected. That’s right, the grid-connected
15:42
value was 0.65 ohms. What if you take
15:45
the same measurement now, off-grid?
15:48
We switch back, check that we have voltage,
15:51
then take the same measurement again in
15:53
off-grid mode. We get a lower short-circuit
15:56
current and a higher impedance.
15:59
We’re up to 1.17 ohms here.
16:01
That’s high. What’s considered too high?
16:04
When you enter this into a calculation
16:07
programme, it will tell you if there’s a risk of
16:10
excessively long disconnection times and a fire
16:13
risk in the cable. The disconnection time could be as long as
16:17
60 seconds if there’s a fault.
16:21
Right. So essentially, we have too much resistance to
16:23
earth, which means the current flows
16:25
too slowly and puts stress on the cable.
16:27
That’s what can cause the fault
16:30
according to the calculation. We may also
16:32
need to add residual current devices
16:35
to the installation. And here we have
16:38
two different operating modes: grid-connected operation,
16:41
where everything works as normal, and then
16:42
the more complicated mode where we need to
16:45
check things and effectively double-check them,
16:47
because we’re supplying the whole consumer unit—the same
16:50
consumer unit as in grid-connected operation—with off-grid
16:52
power. That gives us new conditions
16:54
to consider. We can’t use everything in the house
16:57
even when we’re off-grid, because we all have different loads
16:59
that use different amounts of energy. This system also
17:01
has limits; it can’t supply unlimited
17:04
power. Exactly. There can be starting currents
17:07
and certain inductive loads that may not work
17:09
off-grid. In those cases, you usually
17:11
move them to the far end of the system,
17:13
outside the circuits included in island mode,
17:15
so they’re disconnected during a power cut.
17:17
It’s quite sensible to leave things like
17:19
the EV charger or the sauna outside the backup circuits,
17:20
as you probably don’t need to run the sauna
17:22
in island mode. No, you don’t need the sauna
17:23
in island mode. The most important thing is that the Wi-Fi works.
17:25
Exactly. And that you can charge your phone.
17:27
Right, we’ve checked that. Now we can take those readings
17:30
and do our calculations.
18:02
A common misconception about solar installations
18:03
is that they normally keep producing when the power goes out.
18:06
That isn’t true for most inverters.
18:10
This is due to safety functions. This common
18:12
misconception means many homeowners
18:14
and end customers are very disappointed when
18:17
they’ve bought a solar installation,
18:21
the power goes out and the system doesn’t work.
18:23
To make it work, you need an inverter
18:24
that supports island mode. To get
18:26
island mode working, you need a number of
18:28
different components. One, of course, is an inverter
18:30
that supports island mode or backup. You also need an
18:32
ATS, or automatic transfer switch,
18:34
to automatically disconnect from the grid.
18:38
Together with a suitably short
18:40
disconnection time, this allows the whole solar energy system
18:43
to operate in island mode. Batteries are of course a critical
18:46
component. How long you can operate
18:48
in island mode depends on how much battery
18:57
storage you have. It’s easy to say that the more
18:59
loads you use—the heat pump, charging the EV
19:02
and using the sauna in island mode—the faster
19:05
your batteries will drain.
19:07
So, in island mode, it’s more about conserving
19:10
energy and making it last as long
19:12
as possible. You need to be smart about how you plan your
19:15
island-mode installation, so unnecessary loads
19:17
don’t turn on and drain the battery,
19:21
while allowing you to power the most
19:22
essential loads for as long as possible.
19:25
Of course, the cost is often what limits
19:26
how many kilowatt-hours of energy storage you can invest in.
19:29
With Huawei batteries, you can build a system
19:31
with up to 84 kilowatt-hours,
19:32
which is enormous. You can connect several
19:35
battery packs and systems together
19:37
as one large battery to get a very long
19:39
island-mode capability. Island mode itself isn’t technically
19:42
complicated, but the system can become quite
19:44
technically complex. So don’t hesitate to ask
19:46
and get in touch with us at Sener
19:49
if you want to know more about designing
19:51
your island-mode systems. Another tip
19:54
is to think about whether you have any other requirements,
19:57
for example whether you need a backup generator,
19:59
how solar power should be connected and how much
20:02
energy storage you have. That way, you get the whole picture
20:05
and can set realistic expectations for what
20:08
the system should be able to deliver,
20:11
because how the system is used determines how it performs.
20:14
We’ll finish with one last check using the final instrument:
20:17
an earth electrode resistance test.
20:21
If you need to check an existing earth electrode
20:24
afterwards, it’s useful to have one of these instruments
20:26
so we can measure an existing earth electrode.
20:28
Right, and we should get roughly
20:30
the same reading as last time, using the other instrument,
20:32
just measured in a different way.
20:35
Exactly. We attach it around the cable here again,
20:38
then measure and see what we get.
20:40
We get 20.46, so it’s reassuring that
20:43
both of our measuring instruments show the same thing,
20:46
using two different measurement methods.
20:48
So we have a result for the earth electrode.
20:52
Great, Rickard. That was a lot of checks,
20:55
but everything works. It was fantastic to see
20:58
that when we just switched off the fuse,
20:59
it went straight into island mode and we noticed
21:01
nothing at all.
21:04
No, it works brilliantly. There’s a bit of extra work
21:06
with the earth electrode, of course. You have to
21:07
make sure it’s good and measure it, and also
21:10
take the measurements in island mode
21:14
to get the short-circuit current and reassess the installation,
21:18
so we can calculate it properly.
21:20
I can say this, Rickard: none of this would have worked without you.
21:22
Many thanks for today.
21:25
Thank you. It was fun to be here.
21:27
We’ll do the next installation. Thanks.
22:01
To sum up what we’ve looked at in this episode,
22:03
we’ve covered how a solar energy installation
22:04
with energy storage and an ATS can be connected
22:07
as a system capable of operating in island mode.
22:11
We’ve seen how to install an earth electrode
22:14
and check that it meets the required resistance
22:18
requirements. We’ve also looked at Huawei’s new
22:20
system, with the M0 series, which supports island mode
22:24
on three phases, as well as the new S1 battery.
22:28
Its greater capacity gives you more
22:33
kilowatt-hours as a customer. We’ve also got the Vandstås mounting system
22:36
here, and out here in this beautiful archipelago
22:40
it can get very windy, so it’s important that the mounting system
22:43
holds the panels securely. The panels
22:46
in this episode are from Longi. They’re from
22:48
Longi’s new Ultra Black series, which is
22:50
not only extremely attractive and black,
22:52
but also very reliable, from one of the world’s
22:56
largest manufacturers, Longi. What I like most about the installation
22:58
and the panels is the black standing-seam metal roof,
23:02
with black mounting components and really
23:04
black panels. It looks fantastic. Thanks for joining us.
23:07
Do have a look at previous episodes on Sener Play and
23:09
please follow us. Take care, goodbye.
Go to the products in our online shop

Solar panels from Longi

Control and energy storage from Huawei
Need help finding the right one?
We know it isn't always easy to know which product or solution is best. Whether you have questions about our range, need guidance or would like help finding a solution that suits your specific needs, we're here for you. With our knowledge and experience, we'll help you make the right choice.
Related posts

We meet ATMOCE
Solis and Dyness on a farm in Halland